Installation
Install Pulzen Gateway in your environment
To install Pulzen Gateway in your environment, follow these steps:
Requeriments
- Docker
- Mongo DB
Docker specifications
- Operating System: Linux
- Memory: 2 GB
- Cpu: 2
Step 1: Docker Run
Run the following command
docker run -d -p 8080:8080 --name pulzen-gateway-api pulzen/gateway:latest
Install on Azure as Azure Container App
To install Pulzen Gateway in your Azure environment using Container Apps, follow these steps:
Requirements
- Azure Account
- Azure Container Apps Environment
- MongoDB Atlas Database instance
Container App specifications:
- Operating System: Linux
- Region: East US
- CPU: 2 cores
- Memory: 4 GB memory
- Minimum instances: 1
Step 1: Create a Container App
- Go to the Azure Portal.
- Click on the "Create a resource" button.
- Search for "Container Apps" and click on "Create".
- Fill in the required information:
- Subscription: Select a subscription
- Resource group: Select or create a new resource group
- Container app name: Choose a name for your app
- Region: Select your preferred region (e.g., East US)
- Click on "Next: Container" and then "Create".
Step 2: Configure the Container
- In the "Container" tab:
- Name: pulzen-gateway
- Image source: Docker Hub or other registries
- Image and tag:
pulzen/gateway:latest - Development stack: Java
- CPU and Memory: 2 CPU cores, 4 GB memory
- Environment variables:
You need to add the following environment variables to the Container App. LICENSE_API_APP_KEY is need to get one contact us at cleveritgroup
MONGODB: mongodb+srv://username:password@cluster/databasePROFILES_DEFAULT: mongoLICENSE_API_APP_KEY: LICENSE_API_APP_KEY- Add the variables depending on your VCS system (GitHub, Bitbucket, GitLab, Azure DevOps). Quick start
- Click on "Next: Ingress" and then "Create".
Step 3: Configure Ingress
- Enable Ingress
- Choose
Accepting traffic from anywhere - In target Target port type
8080 - Click on "Next: Tags" then on "Next: Review + create".
Step 4: Create and Deploy
- Click on "Review + create" to review your configuration.
- Click on "Create" to deploy your Container App.
- Wait for the deployment to complete.
- Once deployed, you can access your application through the provided URL.
Step 5: Configure Scaling
- Go to the resource created
- Select "Application" then "Scale" and:
- Min replicas: 1
- Max replicas: 5 (or as needed)
- Press "Save as a new revision"
Mongo DB
Clever Perfromance uses MongoDB as a database. To create your MongoDB Atlas instance, follow these steps:
Create a new MongoDB Atlas instance
- Go to the MongoDB Atlas website.
- Click on the "Create a new cluster" button.
- Fill in the required information and click on "Create".
- We recomend to use the free tier cluster and then scale it as needed.
Create a Azure Cosmos for MongoDB API
- Go to the Azure Portal.
- Click on the "Create a resource" button.
- Search for "Azure Cosmos DB" and click on "Create".
- Fill in the required information and click on "Create".
Azure & Costs
The application can be deployed in Azure, using the Azure Container Apps service or Azure Kubernetes Service (AKS).
Azure Container Apps
This is the recommended way to deploy the application in Azure. Container Apps provides a serverless container platform with automatic scaling, built-in load balancing, and integrated monitoring. The costs are based on consumption (CPU and memory usage) and the number of requests.
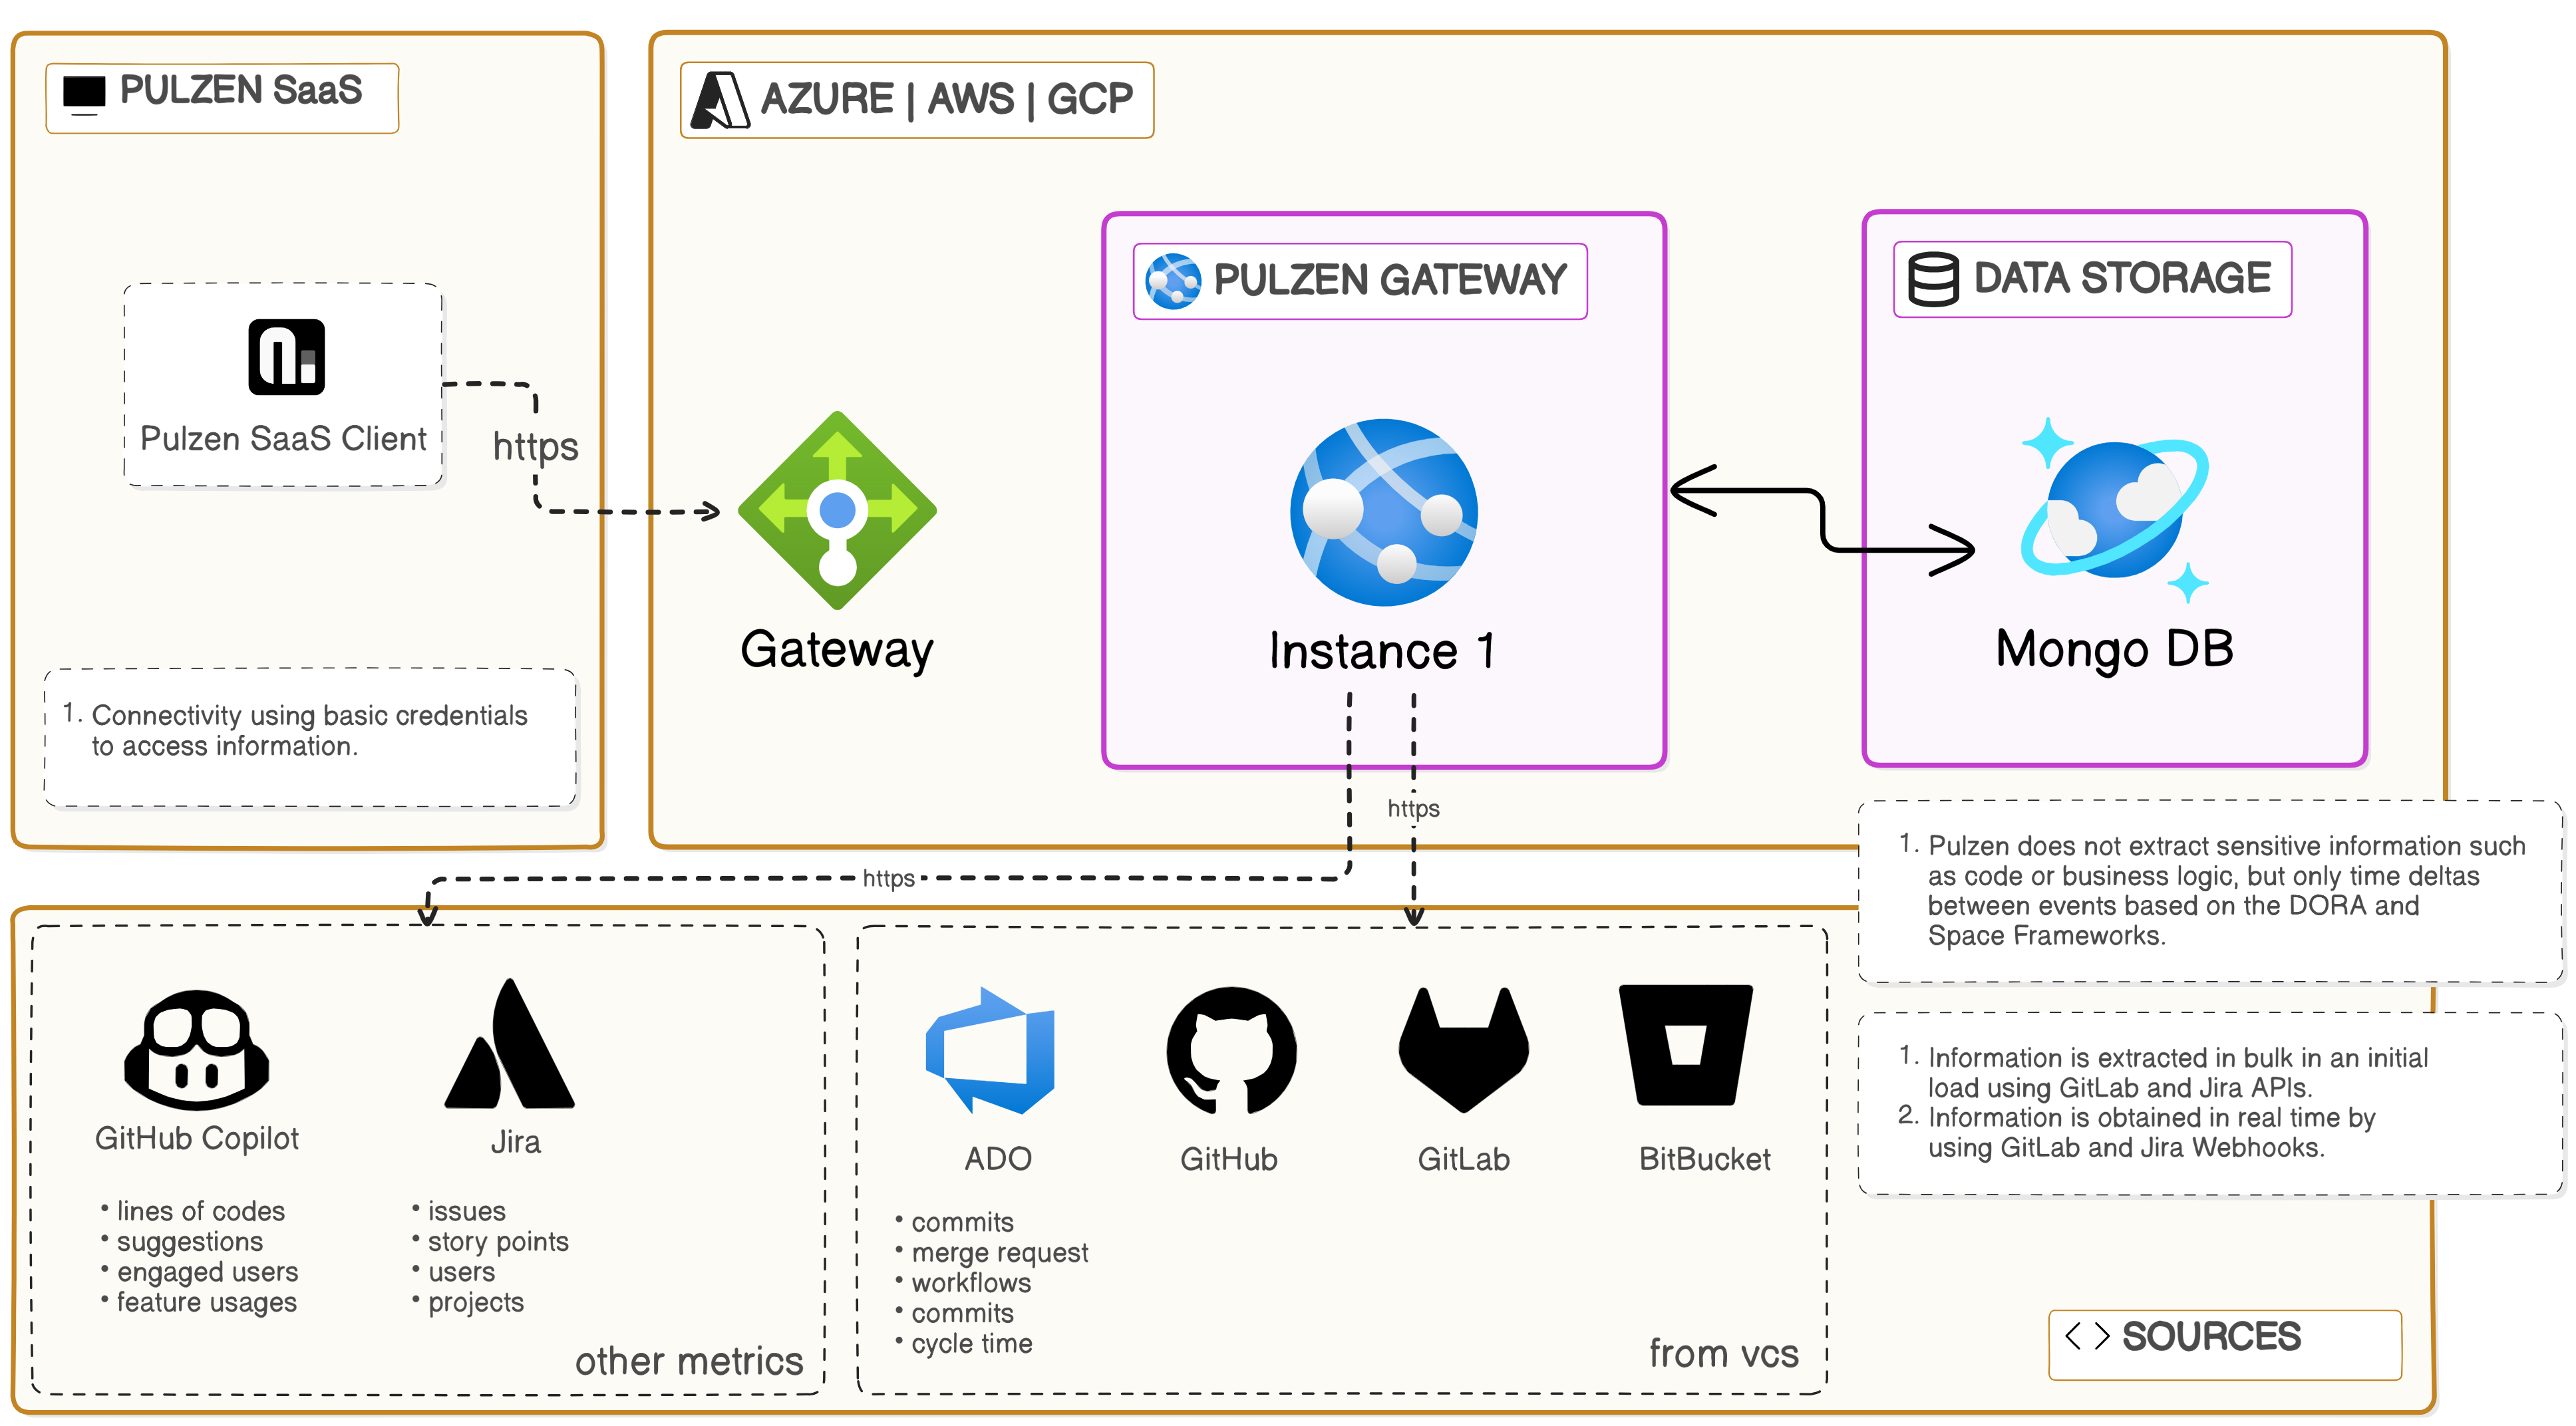
- The application connects to VCS via API and webhooks to get the data, all the data will be stored in the MongoDB database.
- Container Apps automatically scales based on demand and provides built-in monitoring and logging capabilities.
- The minimum instance count is set to 1 to ensure the application is always available.
Persistence
The application uses MongoDB as a database. You can use the Azure Cosmos for MongoDB API service or a MongoDB Atlas instance, either way, you will have to pay for the service.
- Azure Cosmos for MongoDB API: Use RU (Request Units) to pay for the service.
OpenAPI Specifications
API specifications can be viewed at the url: [URL]/swagger-ui/index.html